Understanding how installers ensure vinyl fence panels stay level is key to appreciating professional fence installation. A vinyl fence remains level not because of the panels themselves, but due to the precise work done underneath during vinyl fence installation. Every step, from layout and measuring to digging holes, setting line posts and vinyl posts, and aligning rails through the correct rail hole, determines whether the finished fence looks straight or drifts across uneven terrain.
When considering how do installers ensure vinyl fence panels stay level, it involves detailed planning, accurate use of tools like laser levels and string lines, and consistent depth control when digging holes for every post. Rushing or estimating any part of this process can cause the entire fence line to shift out of alignment. Professional installers emphasize keeping every post aligned and every rail positioned correctly to ensure the fence remains straight, stable, and visually consistent from end to end.
Why Level Vinyl Fence Panels Matter
A level vinyl fence is essential not only for appearance but also for performance and durability. Correctly installed vinyl fence panels distribute pressure evenly across all posts and rails, preventing stress points. This is especially important in areas exposed to wind or shifting soil. Unlike wood fences, vinyl fences require less maintenance but still need proper installation to avoid issues with pickets and rails.
A straight fence line enhances property presentation. Even minor deviations become noticeable when multiple fence sections run across a yard. Proper vinyl fence installation ensures the top rail remains visually consistent and panels line up cleanly from corner to corner and end post to end post, with pickets evenly spaced from center to edge.
Additionally, proper installation reduces long-term maintenance. A stable vinyl fence requires fewer repairs, less adjustment, and avoids common issues like sagging rails or shifting posts caused by poor alignment.
Challenges in Keeping Vinyl Fence Level
Several challenges affect keeping a vinyl fence level:
- Uneven Ground: Most yards are not perfectly flat. Slope changes can make a fence appear uneven even if individual posts are correctly installed. Installers evaluate grade changes before digging to plan fence section transitions, considering panel length and post spacing.
- Soil Conditions: Loose or sandy soil may shift after installation, while heavy clay can hold moisture and expand. These factors influence post behavior after concrete is poured and cured. Improper soil evaluation can cause a vinyl fence to lean or shift over time.
- Temperature Changes: Vinyl expands and contracts with heat and cold. Spacing and alignment must accommodate this movement to avoid panels binding or shifting, which affects fence appearance.
- Measurement Errors: Small mistakes in spacing or leveling one post can propagate, creating visible waves or uneven fence sections.
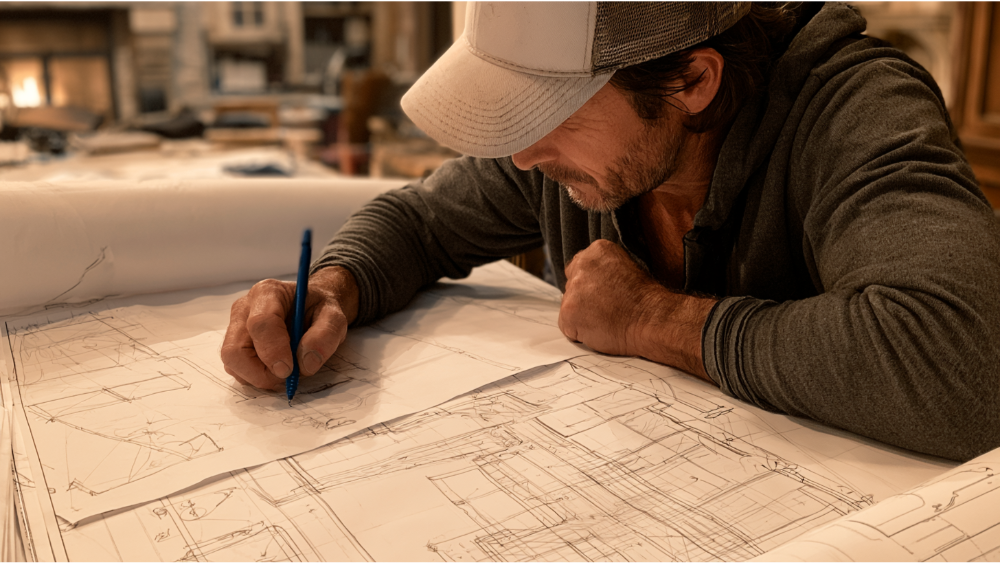
Step 1 | Planning and Layout for Vinyl Fence Installation
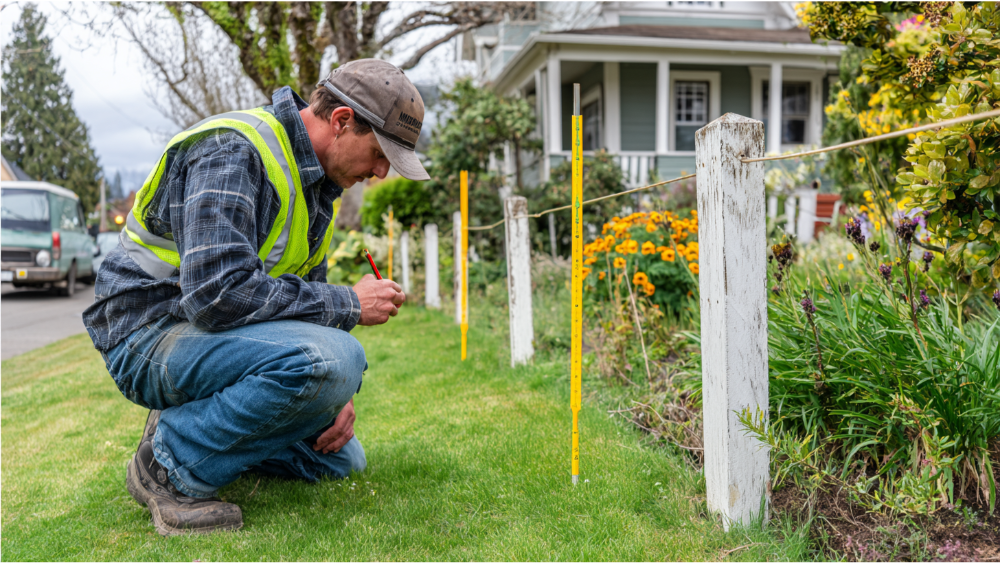
Proper planning is the foundation of successful vinyl fence installation. The entire fence line is measured and marked before digging begins. Installers identify corner points, end posts, and gate locations to fully define the structure.
Spray paint is often used to mark hole locations, ensuring consistent spacing and preventing misalignment. A string line is stretched tightly across the planned route, serving as a straight visual guide for the entire installation. Line posts are placed at regular intervals along the line to support panels and rails.
A line level may be used along the string to confirm consistent elevation across the fence run. Gate posts and end posts receive special attention as they carry additional structural load and require proper reinforcement.
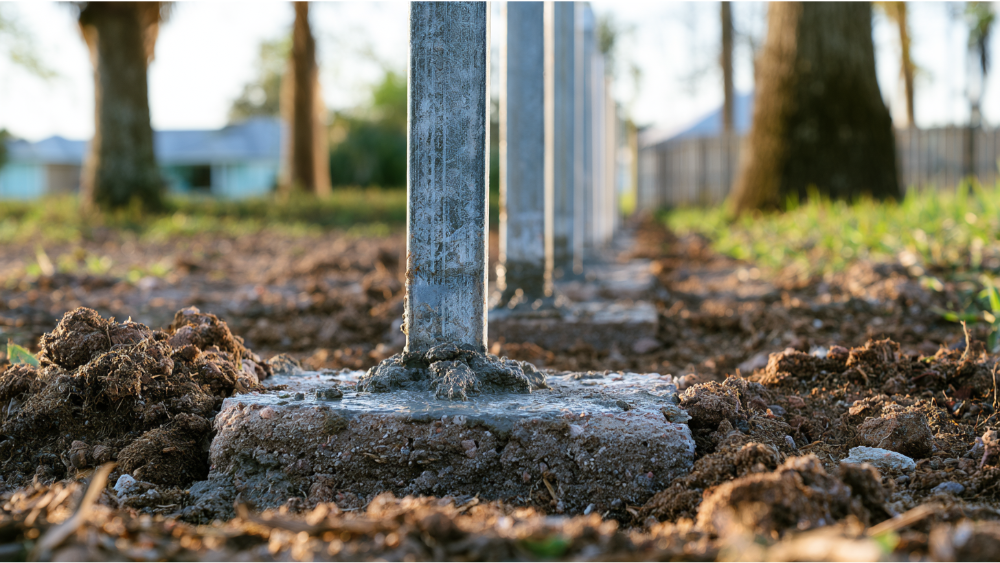
Step 2 | Digging Holes and Setting Posts
After layout, installers dig holes for each post. The depth and width of each hole must be consistent for stability. In many regions, holes extend below the frost line to prevent movement from freezing and thawing soil.
Each post hole is measured to ensure all posts sit at the correct depth, typically one-third of the above-ground post height plus 6 inches for gravel. The hole diameter is usually at least 8 inches to accommodate square vinyl posts or wood fence posts with concrete.
The first post is critical because it sets the reference point for the entire fence. Installers take extra care to position this post perfectly before proceeding.
Once aligned, concrete is poured into each hole to secure posts. The concrete base stabilizes the structure and prevents shifting. Posts must remain stable while concrete cures to maintain accuracy. Installers often pull the post slightly to ensure it is perfectly vertical and then rest it in place while the concrete sets.
Step 3 | Ensuring Alignment with Professional Tools
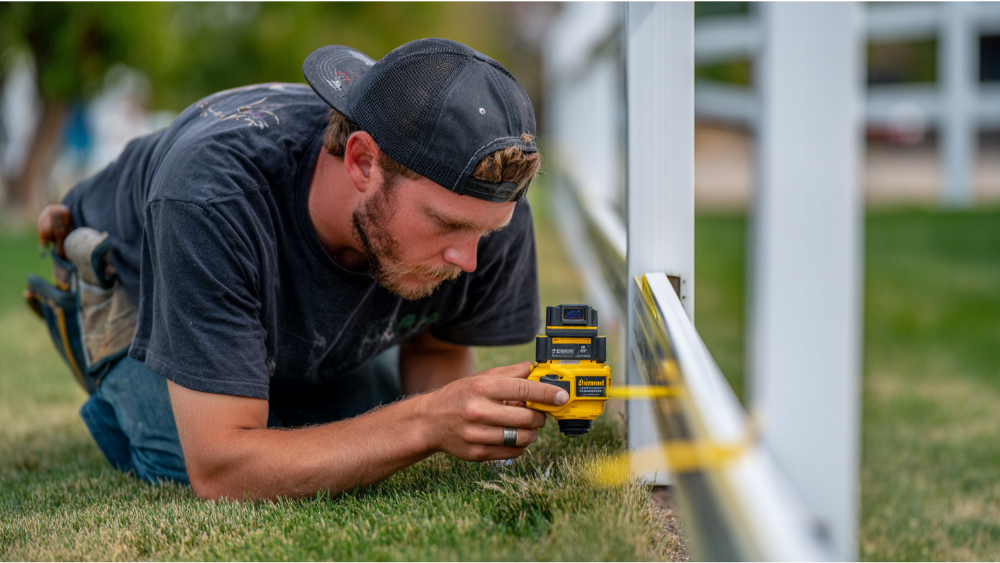
Professional installers use tools like laser levels to maintain consistent post height. Laser levels provide precise elevation control, especially on sloped terrain, ensuring the fence remains visually straight despite uneven ground.
The string line is continuously checked during installation. Adjustments maintain a consistent straight line across posts. This combination of laser level and string line guarantees accuracy in height and alignment.
Each post is also checked for vertical alignment before concrete fully sets. Even slight tilting can affect panel fit and the overall fence structure.
Step 4 | Handling Slopes with Stepping and Racking Methods
When installing vinyl fences on slopes, installers use either the stepping or racking method:
- Stepping Method: Each fence section remains level while stepping down the slope in increments. This creates a clean, structured look where each fence section is perfectly horizontal, despite elevation changes.
- Racking Method: Panels follow the slope angle, suitable for gradual inclines where a stepped look is not desired. Rails and panels adjust to follow the ground more naturally.
Choosing between these methods depends on slope severity, fence design, and visual preference. Both require precise alignment to maintain a straight visual line.
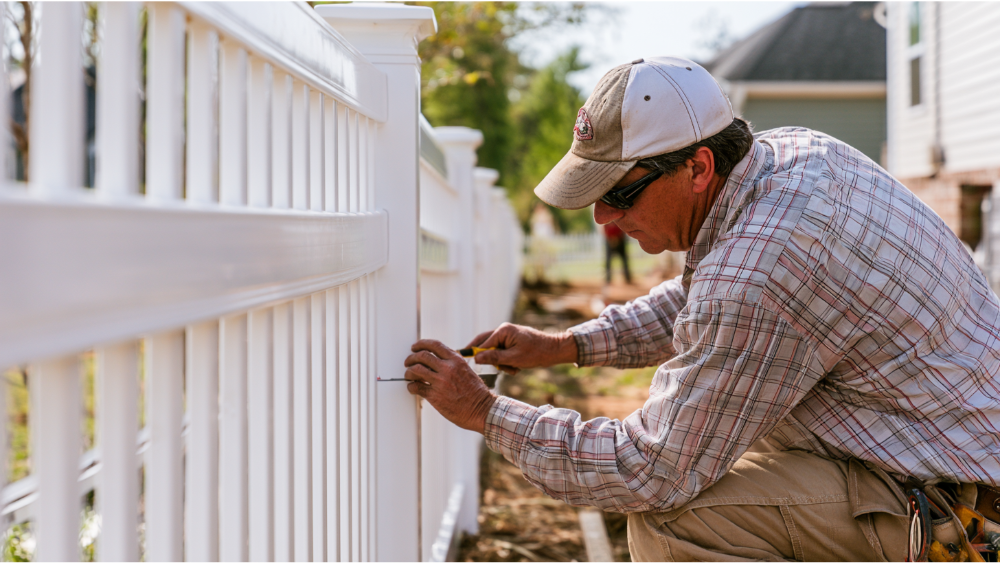
Step 5 | Installing Panels and Rails
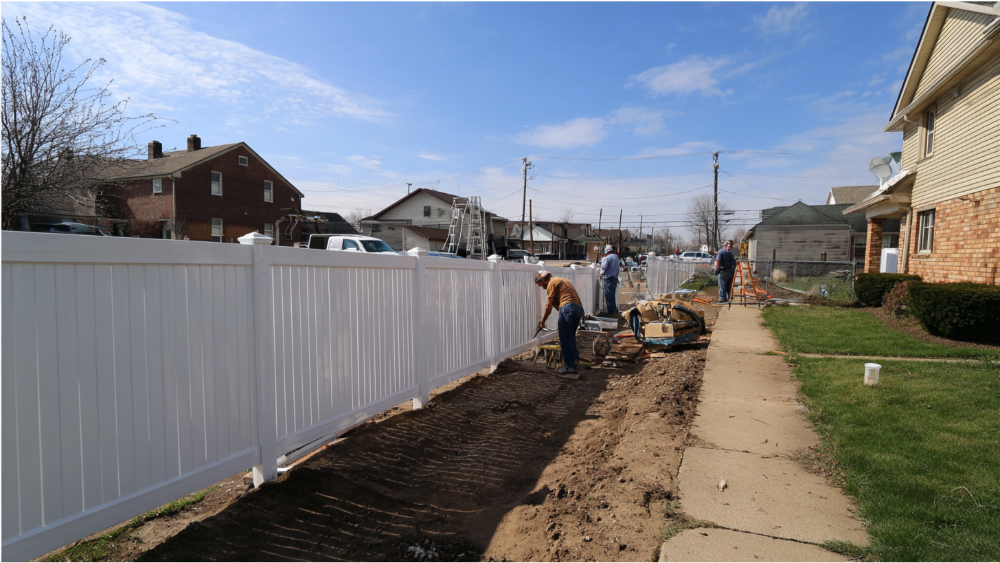
With posts set and stable, panels are installed between them. The bottom rail is installed first to establish base alignment, ensuring proper support from the ground up. Installers carefully insert pickets into the rail channels, starting at the edge and moving toward the center for even spacing.
The top rail is aligned using the string line or laser level reference to maintain a straight appearance across sections. Even small misalignments in the top rail become visible over long runs.
Panels are carefully inserted and adjusted between posts before final securing. Proper alignment is verified before using self-tapping screws or fastening systems to attach rails to posts, as adjustments become difficult afterward.
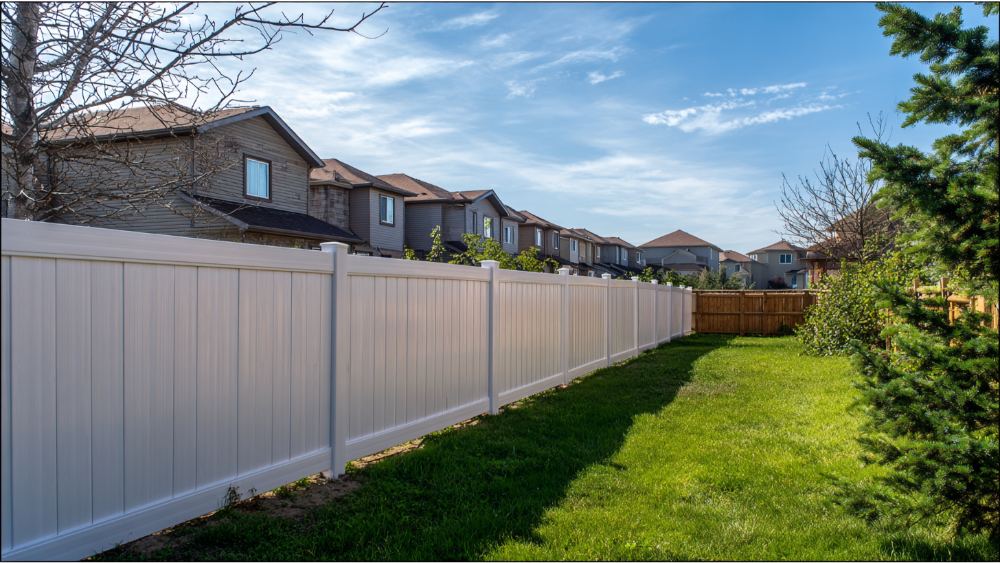
Step 6 | Quality Checks and Final Adjustments
After installation, the entire fence is inspected from end to end. Installers check for inconsistencies in height, spacing, or alignment. Viewing from multiple angles helps identify issues not visible from one perspective.
Concrete stability is verified after curing to ensure posts have not shifted. Minor adjustments are made before finishing touches.
Finishing includes checking gate alignment, verifying rail connections, and confirming panels are securely locked in place for a clean, uniform appearance. Installers suggest walking the fence line to spot any uneven boards or pickets that need adjustment.
Common Installation Mistakes to Avoid

Common mistakes include:
- Incorrect hole depth or inconsistent spacing, causing uneven fence lines.
- Ignoring slope conditions, leading to shifted or misaligned sections.
- Poor post alignment, resulting in panel fit issues and reduced durability.
Proper measurement, planning, and alignment prevent these problems. A useful tip is to never forget to check the rail hole size and alignment before inserting rails, as this can affect panel fit.
Professional Installation vs. DIY Results
Professional installation uses precision tools like laser levels, string lines, and controlled concrete setting to ensure accuracy. This results in a straight, stable fence that remains consistent across varying terrain.
DIY installations often rely on visual estimation, leading to cumulative errors. Without proper tools and experience, small mistakes in post alignment or hole depth cause visible irregularities.
A professional installation ensures long-term stability, clean alignment, and reduced maintenance.
Frequently Asked Questions
How deep should vinyl fence posts be set to ensure stability?
Vinyl fence posts should be set at least 30 to 36 inches deep, or one-third of the above-ground post height plus 6 inches for a gravel base. This depth provides stability and helps prevent shifting due to soil movement or frost heaving.
What tools do installers use to keep vinyl fence panels level?
Installers commonly use laser levels and string lines with line levels to maintain consistent post height and alignment. These tools ensure posts are vertically straight and panels remain level across the fence line.
How do installers handle installing vinyl fencing on sloped terrain?
There are two main methods: the stepping method, where panels remain level and step down the slope, and the racking method, where panels follow the slope angle. The choice depends on slope severity and fence design preferences.
Why is it important to pour concrete around fence posts?
Pouring concrete stabilizes fence posts and prevents them from shifting over time. It also helps maintain vertical alignment during curing, which is critical for keeping vinyl fence panels level.
Can vinyl fence panels be installed without waiting for concrete to dry?
While some installers may prefer to wait for concrete to cure fully, temporary bracing methods allow posts to be held in place while concrete sets, enabling panel installation sooner without compromising alignment.
What maintenance is required to keep a vinyl fence looking level and straight?
Vinyl fences require minimal maintenance. Regular cleaning and periodic checks for loose posts or rails help maintain appearance. Ensuring proper drainage around posts also prevents soil movement that can affect fence alignment.
Conclusion
Ensuring vinyl fence panels stay level involves precise planning, accurate measurement, and careful installation techniques. From setting deep, stable fence posts with proper concrete footings to using professional tools like laser levels and string lines, installers tackle challenges such as uneven ground and slopes with proven methods like stepping and racking. Attention to detail during each phase, from digging post holes to final panel adjustments, results in a durable, visually consistent fence that enhances property value and requires minimal maintenance. Whether choosing professional installation or a well-prepared DIY approach, understanding these key steps helps guarantee a vinyl fence that stands straight and level for years to come.